
25 DIY Modern Farmhouse Style Projects That are Versatile and Oh so Glorious!
In the current scenario of chic high-fashion home decorations, farmhouse style pieces of furniture or decor somewhat seem to be a rare-to-find affair. And that’s what makes such items come for a super costly deal when going for store-bought ones. However, just a few steps and some creativity is all it takes to work up these glorious DIY modern farmhouse style projects for your home.
13. DIY Farmhouse Shelves

Oh so budget-friendly corbels from Home Depot are the foundations for these mesmerising shelves that are all one need to display a whole bunch of decorative items with true splendour. Coming for just a deal of 13 dollars, the corbels look even more amazing with the stain job, but the clever distressed painting done in the below inspiration by Lolly Jane makes them even more awesome.
After the stain dries, the key is to rub some petroleum jelly on the spots you don’t want to paint, applying a mixture of some chalk paint powder and flat paint over the whole corbel. Power sanding the edges makes the dark layers underneath show through to get the desired vintage effect, finally sealing the corbels with a layer of wax. Stained boards of pinewood work wonders for the shelves when attached to the corbels with the help of screws, anchoring the same onto the wall.
DIY Details : lollyjane
14. DIY Industrial Farmhouse Bathroom Sign
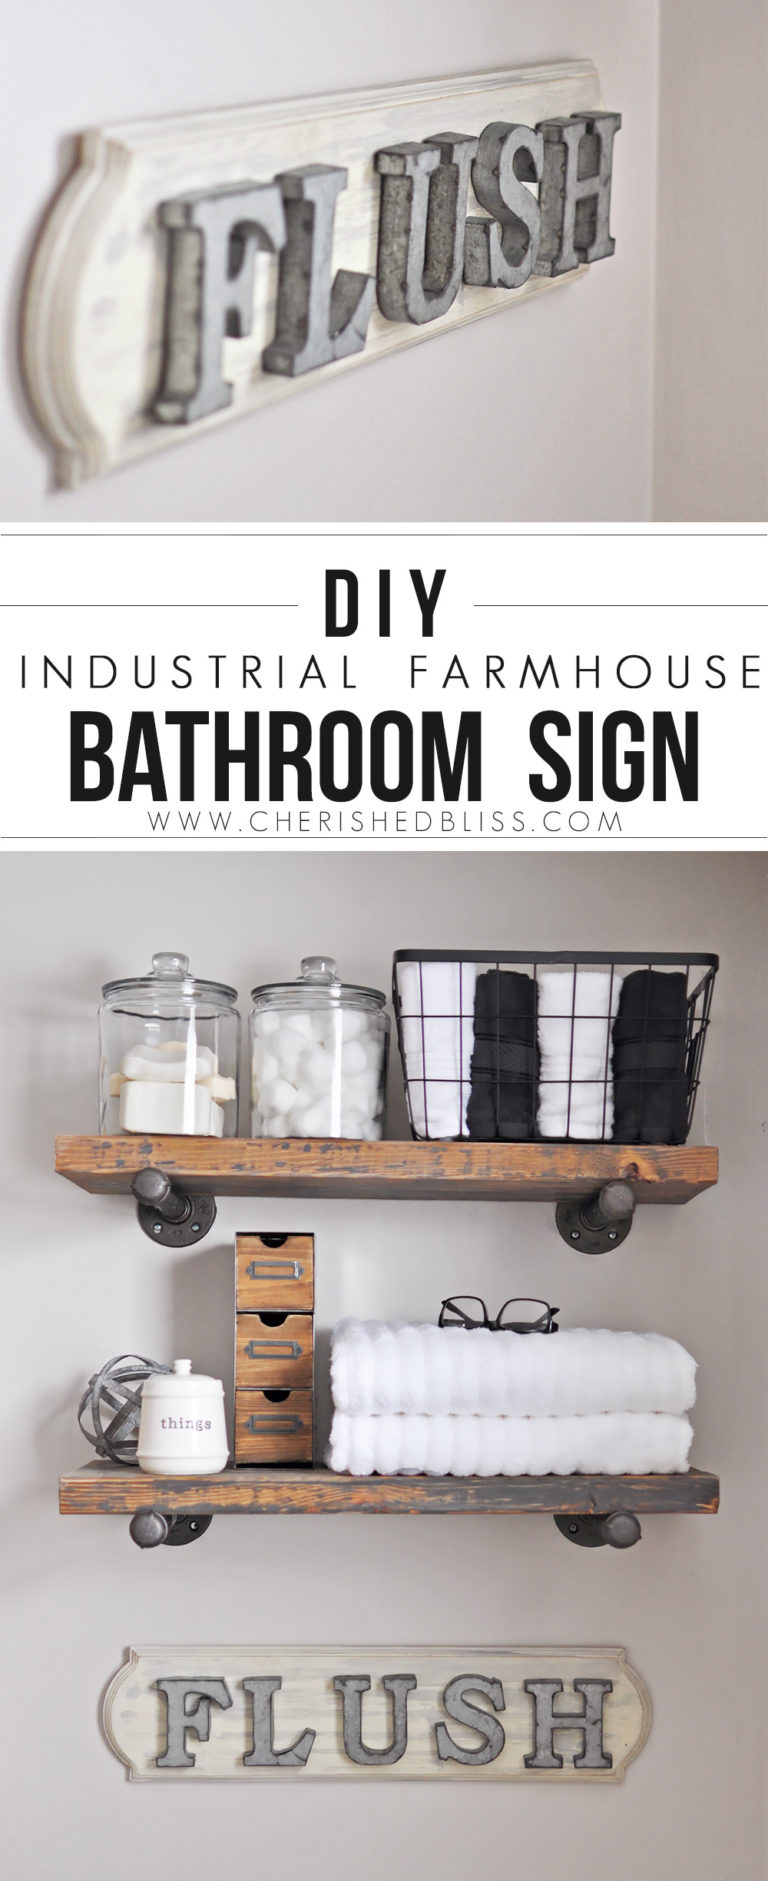
Allow a homemade bathroom sign that blends the essence of industrial and farmhouse decor together, while also working as a reminder to flush every time someone uses the bathroom. The rustic wooden plaque takes the credit for the farmhouse essence, letting the metallic-looking 3-dimensional letters bring out the industrial charm in the finished sign.
Gather some chalk in the paint colors Sheepskin and Parisian Grey, some white wax, paint brushes, a layering block, a wooden plaque, some metal Letters, a fine grit sanding block, a hammer and nails to get started with the project. Attach the letters to the stained and painted plaque, finally hanging it, and voila! To learn more about the construction, check out the below tutorial by Cherished Bliss that takes you through the process in detail.
DIY Details : cherishedbliss
15. Old Door New Bench
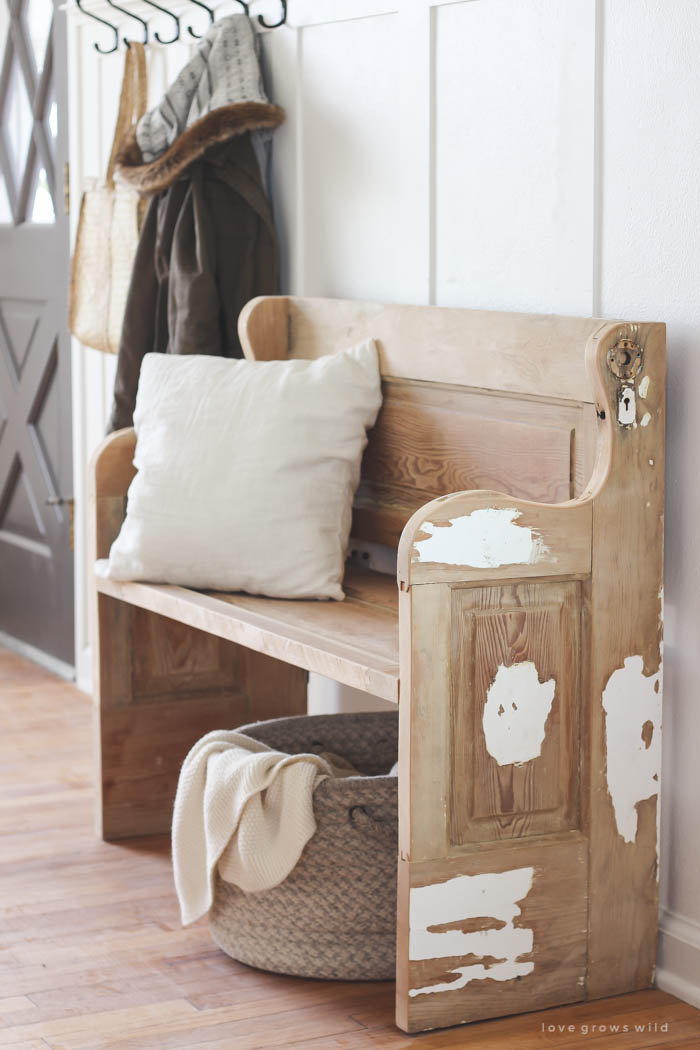
Adding an all new life into an otherwise useless, crooked door without much of a purpose and disguising it as a wonderful farmhouse-finish bench seems to a great idea when you have got this example by Love Grows Wild on hand. The idea is to remove the door knob and cut up the door into smaller pieces using a circular saw and turn them into the bench. The top of the door is split down the middle to create the back and seat for the bench, further cutting the bottom of the door in half to make the sides of the bench, cutting around the panel in the middle of the door.
While most of the bench is sanded thoroughly after the different pieces are assembled together using kreg jig and screws, some parts with chippy white paint add so much more character to the furniture. The antique-looking reclaimed wood bench looks wonderful unaltered, but you can integrate a splash of your choice of paint if needed.
DIY Details : lovegrowswild
16. How to Build a Small Farmhouse Buffet
Put together an extravagantly stunning farmhouse buffet, compact and pretty for homes by assembling some simple pieces of wood together as explained in the free plans shared in the below guide by Cherished Bliss. Just a matter of few basic supplies, including some minwax wood conditioner, minwax dark walnut stain, some finishing wax, a lint free cloth, and some brushes for applying stain are all you need to forge the buffet.
The buffet here is a beautifully stained one – but painting it in your own style or doing a combination of paint and stain would work just as well. Use it for a lovely display of food and drinks when you are planning for a get together or party at home, making a great impression on the guests and stealing some rounds of applause at the same time.
DIY Details : cherishedbliss
17. IKEA Hack Bathroom Shelf

Leaning towel holders from IKEA seem to be quite a handy and simple bathroom accessory. But, turning the holder into a bathroom shelf is surely a great hack, that too a pocket-friendly one. The author employs cut wooden boards to work as the shelves, attaching smaller side pieces to a main wooden board using a strong glue or nails for each of the shelves. Once built and stained in your choice of appeal, you place the shelf on the rung of the towel holder.
Adding so much more storage space into a small bathroom, the shelf doesn’t really need to stick to random decor items or plants or soaps – instead you can stack bundles of towels or washcloths on the same, or simply use them to keep all the shampoo and conditioner bottles well-organized. Check out how the rack looks from different angles as shared by Thistlewood Farms.
DIY Details : thistlewoodfarms
18. Milk Can Coffee Table
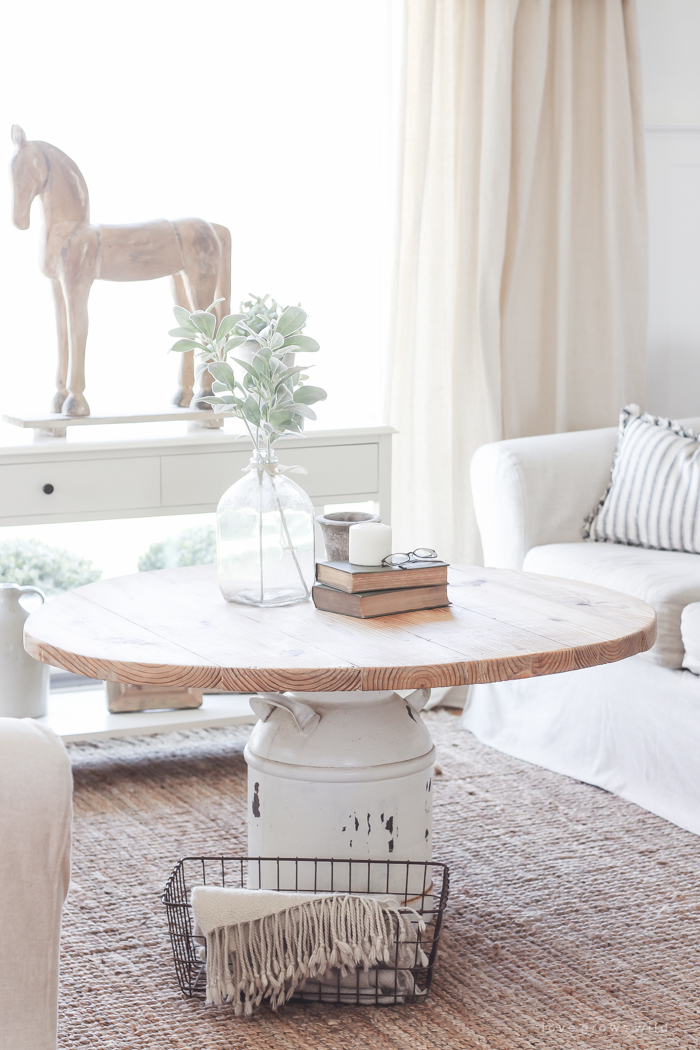
Love Grown Wild is yet again here to inspire you with this amazing and pretty DIY milk can coffee table that looks just like a rare vintage find, but is actually super easy and inexpensive to build at home. Having a large antique milk can from the thrift store double up as the base for the coffee table, the furniture piece comes up as quite an out-of-the-box hack, specially when the can is combined with a huge round table top that’s cut out from a square wooden panel.
Once the piece is thoroughly sanded and the edges are smoothed out, the table top is stained with Minwax Weathered Oak stain, further sealing the wood with a layer of natural paste wax. It’s amazing how you can build such a fabulous-looking table in no more than 20 dollars, stealing the show with that chippy white paint on the milk can. Perhaps, it’s time for some repurposing and building things of farmhouse beauty!
DIY Details : lovegrowswild
19. DIY Farmhouse Bench Tutorial
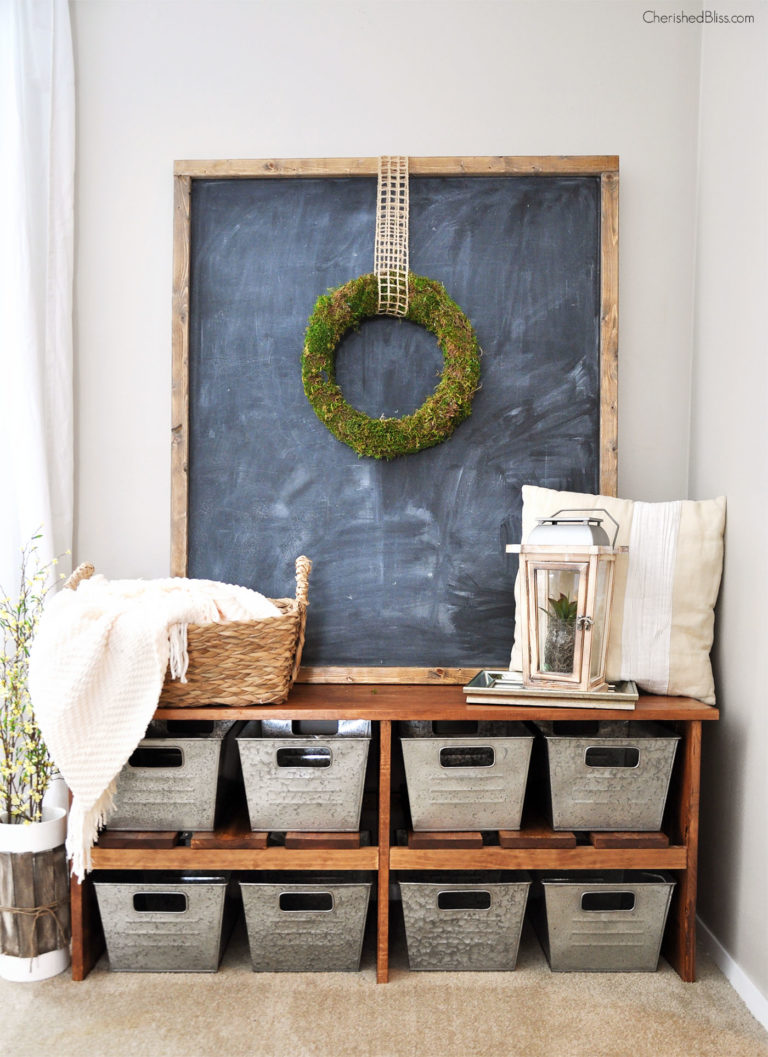
Distinctively stunning are the words that cross the mind when looking at this woody, innovative do-it-yourself farmhouse bench that couples up seating with storage. Each of the four sections underneath the bench house beautiful galvanized bins to store stuff, but wicker baskets would look equally amazing for the farmhouse appeal you are looking for. You are going to need some wooden boards in sizes specified in the below tutorial, Kreg Jig, loads of screws, a square, an orbital Sander, an impact driver, a miter saw, a wood glue, brad nailer, a DIY wood stain, and shellac.
Once you make all your cuts and construct the legs for the bench, you need to build the shelf-top and sand all the pieces to attach them together, further placing the shelf supports in. Next is to nail the shelves down and finish the structure with stain and shellac. Cherished Bliss adds more character to the bench by placing a super large chalkboard on top that’s decorated with a large, luscious green wreath.
DIY Details : cherishedbliss
20. DIY Farmhouse Writing Table
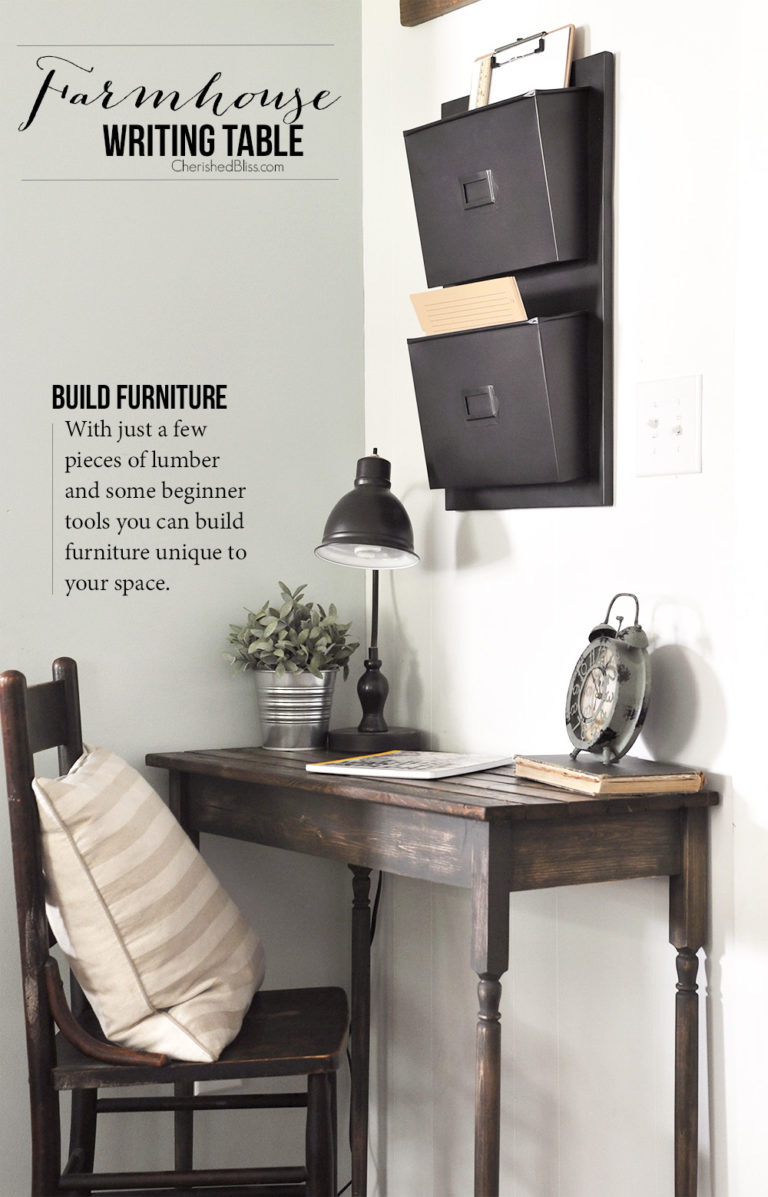
If working from home is your thing, then you must be familiar with the hassle of moving your laptop from the kitchen table to the dining area or a random bench every now and then, specially if there isn’t room enough to build a whole workspace. This DIY Farmhouse writing table is going to come to your rescue, while making sure it takes up just a small deal of space to get the dedicated work corner functioning. The small and airy writing table is surprisingly easy to build, calling for the most basic of woodworking skills and a handful of supplies.
What you need includes some stair spindles, wooden boards, a miter saw, a drill, a finish nail gun, Elmer’s wood glue max, a kreg jig, some pocket hole screws and a basic cut list specified in the below tutorial by Cherished Bliss. The element of style steps in when stair spindles double up as the legs of the super chic table, charmed up even more with the dark distressed stained job it features.
DIY Details : cherishedbliss
21. How to Build a Wood Tote – Farmhouse Inspired Toolbox
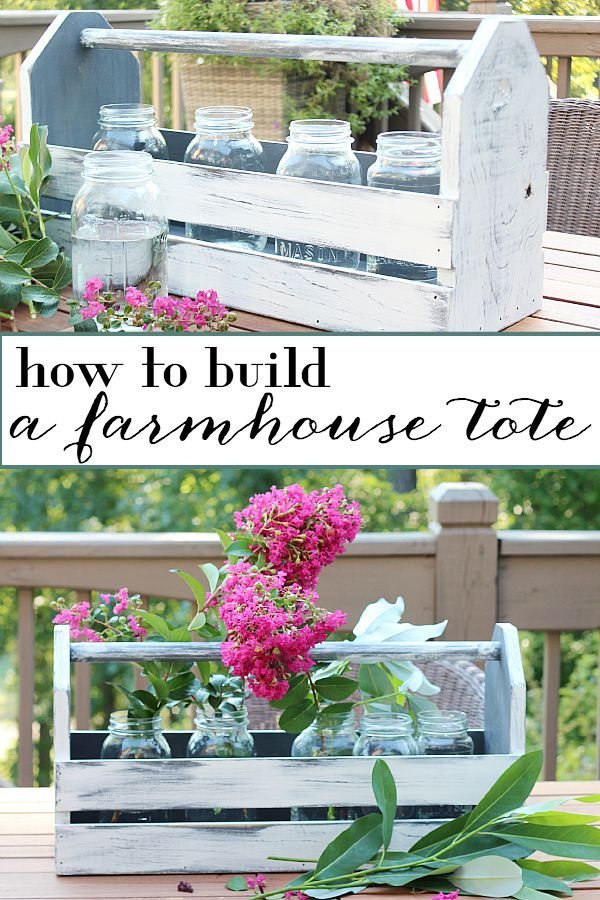
Vintage wood totes are not only hard to find in the current market scenario, but are also super expensive because of the luxurious appeal they integrate into a space. However, building one all by yourself comes for a fraction of the cost you would otherwise spend to get a store-bought wood tote – the magic lies with some basic scrap wood and paint.
Get inspired by this incredibly charming vintage wood tote by Refresh Restyle, gathering a wooden dowel, a hobby board, a scrap wood board, some wood glue, a compound miter saw, a finish nailer with 2 inch nails, some clamps, a forstner drill bit, drill, pencil, a sanding block, and 2 paint colors of your choice. Once the different sections are built and joined together, the entire box is painted with a dark paint base, further layering on a lighter shade when the base layer dries. To create the distressed texture, it’s sanded from certain areas and finished with a wax coat.
DIY Details : refreshrestyle
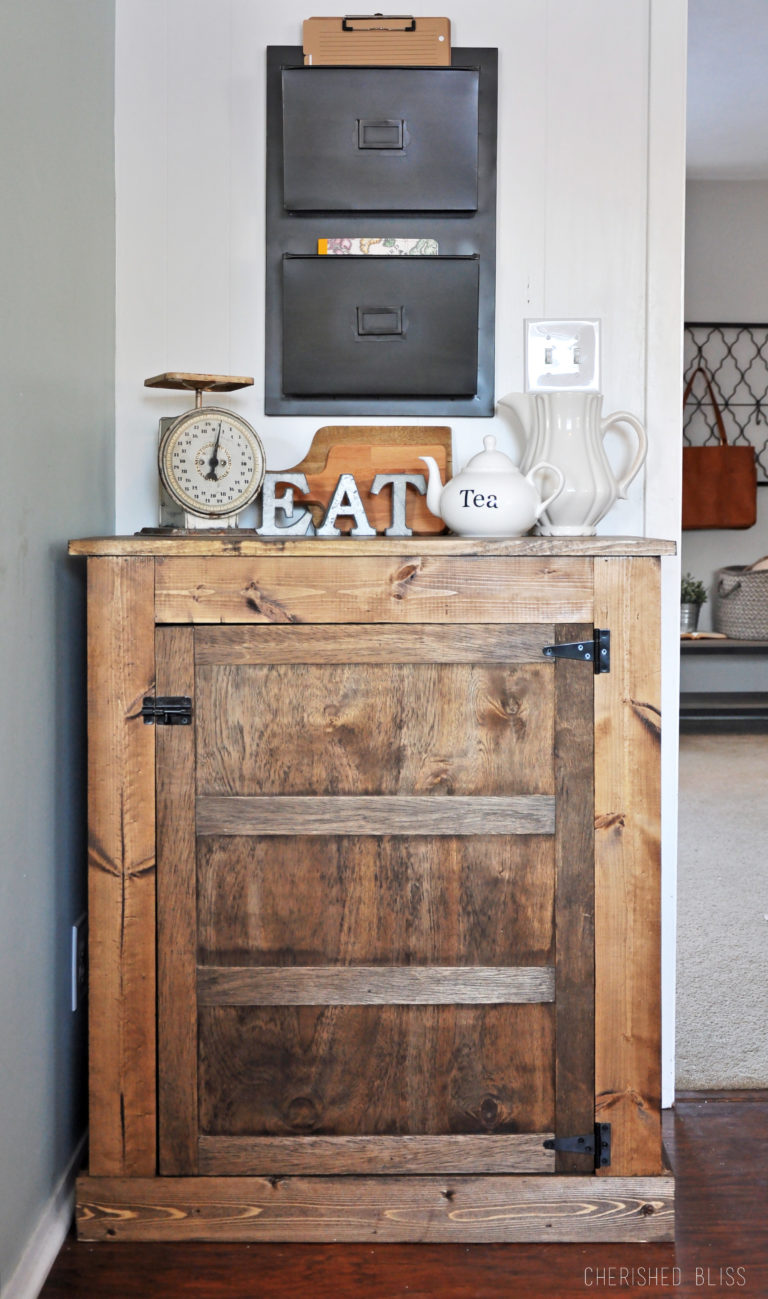
22. DIY Primitive Cabinet from a Repurposed Wooden Crate and Frame

No matter how contemporary, chic or modern your home decor is, this primitive cabinet is only going to charm it up even more – thanks to the versatile structure and color combination it comes with. The farmhouse-styled do-it-yourself cabinet is built from a repurposed wooden crate and frame, standing out with the fact that it stylishly reveals what’s stored inside. And the credit for the same goes to the metallic wire mesh that’s employed inside the frame that forms the cabinet door.
The wooden crate won’t cost you more than 2 dollars when bought from a thrift store, and any old wooden frame would work great for the door. The rusty, worn out texture to the wire is done by setting it on the burners of the gas stove, while the cabinet compliments the whole feel when it’s painted with Blue Minerals Chalk Paint Powder before the wire mesh is stapled to the same. A side latch extracted from an old wall clock helps to keep the cabinet closed.
DIY Details : knickoftime
23. DIY Curtain Rods
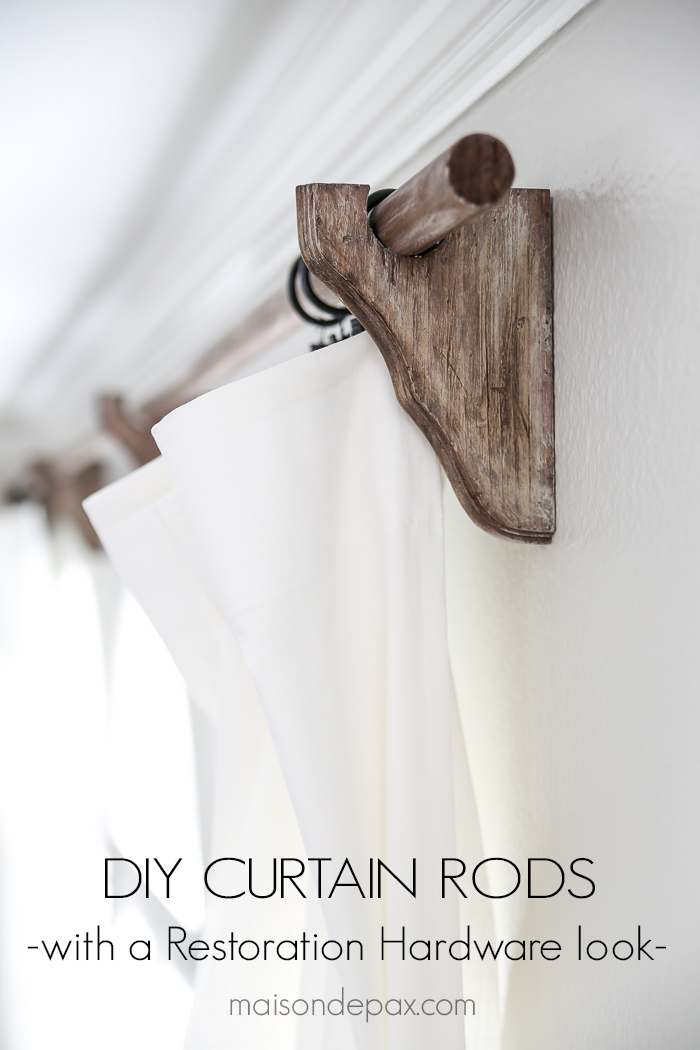
Looking like something from Restoration Hardware, these DIY curtain rods are gorgeous to look at as well as inexpensive to whip up. The real wood rods come for under 15 dollars, standing out from the regular metallic curtain rods with their burnt oak wood texture and the perfect farmhouse essence. You are going to need wood brackets, wood dowel cut to your desired width, hole saw, a cordless drill, medium grit sandpaper, stainless steel wire brush, Minwax special walnut stain, light warm gray chalk paint, dark wax and dowel screws.
Even the curtain brackets here are beautifully distressed, stained and painted with a dry brush in a subtle grey paint that reveals the distressing and grain with perfection. A final layer of dark wax keeps the brackets preserved, making the rich wood tones compliment the neutral-hued walls of the room.
DIY Details : maisondepax
24. DIY Farmhouse Pots
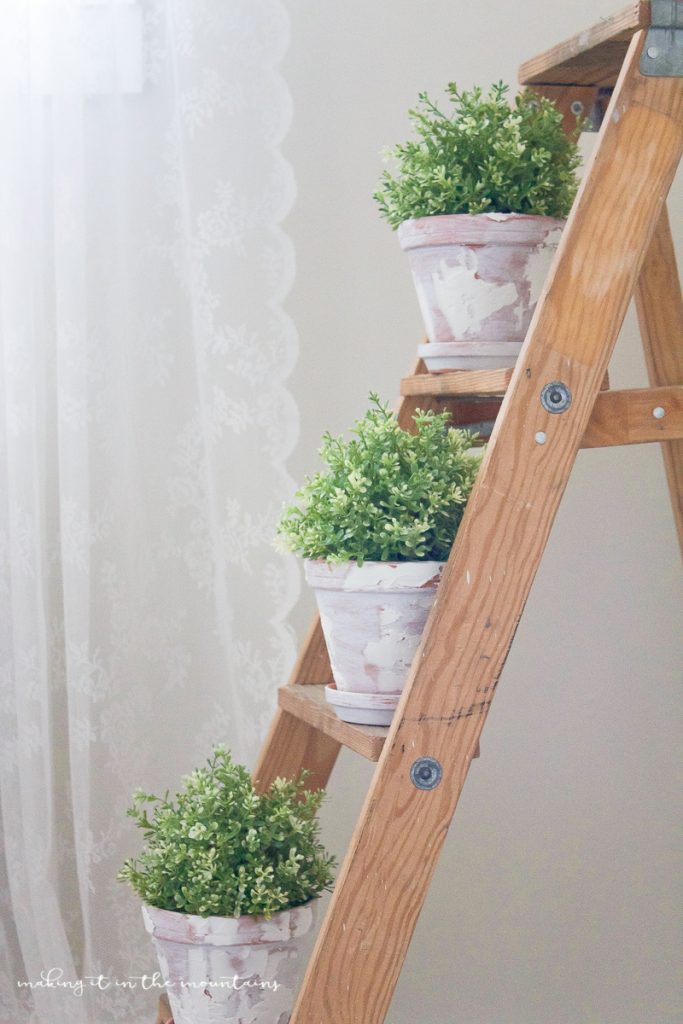
The mere mention of indoor plants brings terra cotta pots to mind, but this farmhouse twist brought to the simple pots transforms them from plain to extraordinary with just a handful of tweaks. You are all set to get started with the makeover grabbing some plain old terracotta pots, a bit of spackle, and some white paint. Begin by haphazardly slapping spackle over the outside of your pots to bring out the texture, further achieving the weathered appeal with leaving bumps and variations when using the spackle.
Once the spackle is dry, allow splashes of paint to do the job – for the rustic essence, simply water down the paint and work it up around the outside of the pots wherein you wipe off the excess with a dry rag. Allow the pots to dry and we bet the end results are going to take your breath away with the kind of earthiness they showcase.
DIY Details : lollyjane
25. Rolling DIY Bookshelf | Restoration Hardware Knock Off

Taking inspiration from Ana White’s plans, Ashley from Cherished Bliss demonstrates how you can build a gorgeous, rolling DIY bookshelf for your home or workspace to celebrate a rustic farmhouse decor just right. She introduces a few tweaks of her very own to the plans, wherein she changes the size of the shelves, alters the bracing on the back from horizontal pipes to metal strips, also tweaking the top and bottom shelf a little.
She also takes you through getting the right finish to the wood using special walnut stain and some Minwax driftwood in order to obtain a weathered look without too much of distressing. Coupled up with tiny wheels, you are surely going to love how the bookshelf turns out, specially when you have got a whole lot of possibilities in terms of customization that can be done to the piece.
DIY Details : cherishedbliss
No matter how contemporary your home decor is, the subtle, neutral hues and wooden textures sported by each of the above DIY modern farmhouse style projects yields a warm and cozy vibe that can compliment just about any room!
More from “FARMHOUSE” category:
-

19 Rustic Yet Chic Wooden Home Decor Ideas Adding a Farmhouse Touch to your Place
-

20+ Amazing Farmhouse Living Room Decor and Design Ideas
-

15 Gorgeous Farmhouse Lighting Ideas Integrating A Lot More Luxury to Your Ambiance!
-

18 Enchanting Farmhouse Christmas Decor Ideas You’ll Want to Implement Now!
-

19 Ultra Stylish Farmhouse Bathroom Vanity Ideas Getting you All Set for The Day